

Your iPhone is more capable than you realize for capturing the dancing northern lights. Modern iPhones make aurora photography accessible to everyone, and you'll be thrilled with the results when you know the right techniques. This guide shows you exactly how to photograph the aurora borealis with your iPhone and create stunning images you'll treasure forever.
Understanding iPhone Aurora Photography
Can you photograph the northern lights with an iPhone? Yes, you absolutely can photograph the northern lights with your iPhone, and the results will impress you. Modern iPhones (iPhone 11 and newer) feature Night mode that makes aurora photography wonderfully accessible. Your iPhone camera often captures more detail and richer colors than your eyes alone, especially during moderate displays.
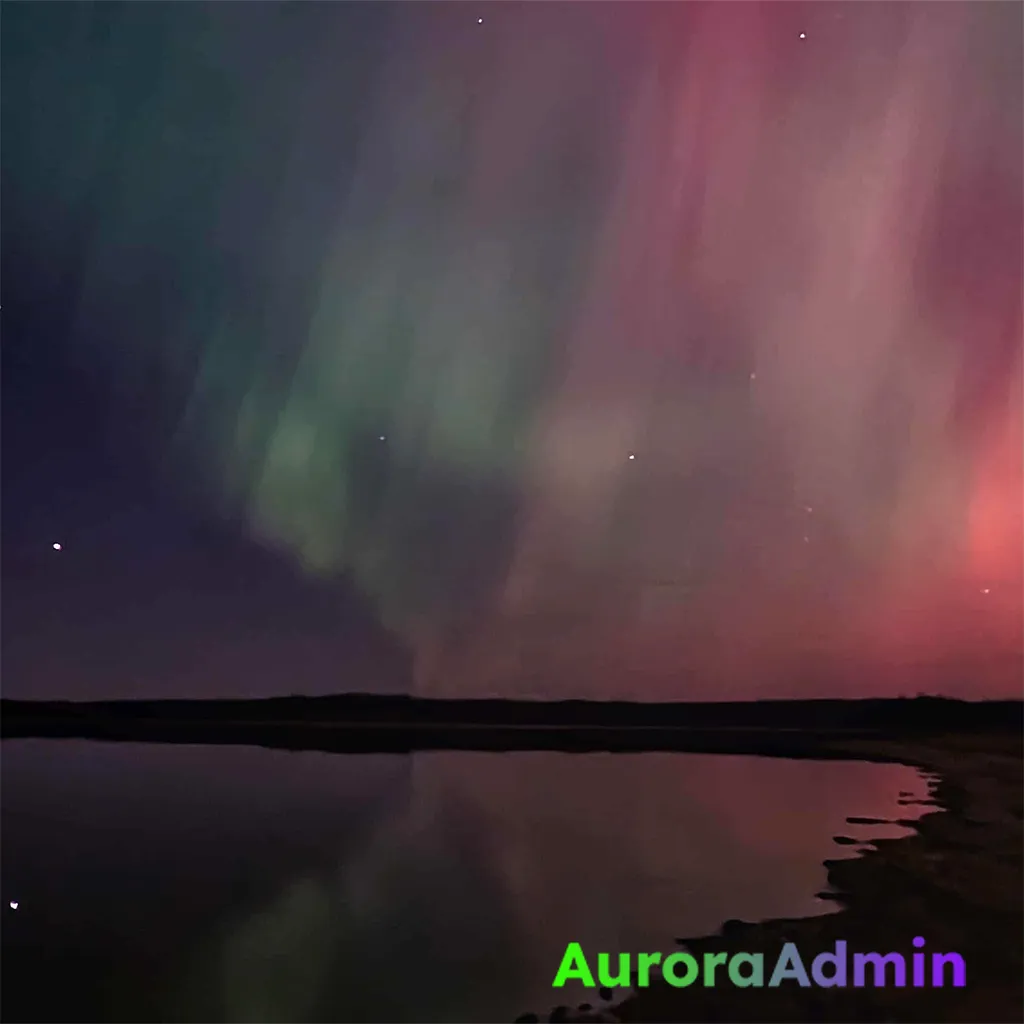
During bright aurora displays (like when Aurora Admin sends those exciting real-time alerts), your iPhone captures incredible detail and vivid colors. Even during gentler displays, your phone still captures beautiful images with the right technique.
Essential Gear for iPhone Aurora Photography
What do you need to photograph auroras with an iPhone? To photograph auroras successfully with your iPhone, you need just three simple items: your iPhone (11 or newer works beautifully), a sturdy tripod, and touchscreen-compatible gloves. That's it! No expensive camera gear required.
A smartphone tripod transforms your results by keeping the camera perfectly steady during exposures. Look for one with flexible legs that wrap around objects or position easily on uneven ground. Even an affordable tripod makes a dramatic difference.
Touchscreen gloves keep your hands warm while you operate your phone. This small investment means you'll actually enjoy your aurora adventure instead of constantly removing gloves in freezing temperatures.
Preparing Your iPhone Before You Head Out
How do you prepare your iPhone for aurora photography? Preparing your iPhone for aurora photography takes just three quick steps: charge your battery fully, download a red light app, and disable auto-brightness. Cold temperatures drain batteries quickly, so starting with 100% charge sets you up for success. Consider bringing a portable battery pack tucked in an inside pocket where body heat keeps it warm.
A red light app (search “red light” in the App Store) helps you see without ruining your night vision. Disable auto-brightness in Settings > Accessibility > Display & Text Size, then manually set brightness to about 30% once you arrive at your viewing spot.
Step 1: Find Your Perfect Viewing Spot and Compose Your Shot
Where should you position yourself to photograph the northern lights? Position yourself away from artificial lights with a clear view of the northern horizon, and include interesting landscape elements like trees, mountains, or buildings to create stunning depth. The aurora typically dances across the northern sky, though during strong displays it spreads gloriously overhead.
Scout locations during daylight when possible. The best aurora viewing spots feature minimal light pollution and compelling landscape features. A lone tree, historic building, or frozen lake transforms your photo from a simple sky shot into a captivating story.
Set up your tripod and compose using the rule of thirds. Place the horizon in the lower third of your frame, leaving plenty of sky for the aurora's performance. Position foreground elements to lead the eye naturally into your scene.
Step 2: Activate and Control Night Mode
How do you activate Night mode for aurora photography? Night mode activates automatically in low light on iPhone 11 and newer models, shown by a yellow moon icon in the upper left. Open your Camera app in darkness and watch for this icon to appear.
Tap the moon icon to reveal a slider controlling exposure length. Start with 3 seconds for bright displays and increase to 10 seconds for gentler shows. Remember, longer isn't always better since the aurora moves and changes. Exposures beyond 10 seconds often create blurry results.
If Night mode doesn't appear, move away from artificial lights and give your camera a moment to adjust to the darkness.
Step 3: Lock Your Focus and Exposure
How do you lock focus for aurora photography? Lock focus and exposure by tapping and holding a distant object (like a tree or mountain) until “AE/AF LOCK” appears on screen. This keeps your iPhone from refocusing during the shot, ensuring sharp results.
Focus on distant landscape features since the aurora sits 100 to 300 kilometers (60 to 185 miles) above Earth. If your scene lacks distant objects, tap a bright star or the aurora itself and hold until locked.
Once locked, avoid tapping anywhere else before shooting. If you need to recompose, move the tripod instead of adjusting through touch controls.
Step 4: Trigger the Shutter Without Camera Shake
What's the best way to trigger the shutter without camera shake? The best way to trigger the shutter without camera shake is using your iPhone's volume button or the 3-second timer. These methods eliminate the vibration from touching the screen.
Simply press either volume button instead of the on-screen button. For even sharper results, use the timer method. Tap the arrow at the top of Camera app, select the timer icon, and choose 3s. This three-second countdown lets any vibration settle before the exposure begins, creating beautifully sharp images.
Step 5: Capture Multiple Shots with Varied Settings
Why should you take multiple photos with different settings? You should take multiple photos with different settings because the aurora changes constantly, and having several exposures ensures you capture the perfect moment. What works beautifully at one phase might need adjustment five minutes later.
Start with 3-second exposures, then try 5 seconds, then 8 to 10 seconds for gentler displays. Shoot continuously as the aurora evolves since dramatic shifts happen quickly. During peak displays, taking 50 to 100 photos throughout the evening gives you wonderful options.
Vary your compositions too. Capture wide shots showing the entire sky, tighter shots of specific structures, and different framings with your foreground elements. The aurora's dynamic nature creates moments of incredible activity, so continuous shooting ensures you catch the magic.
Step 6: Review and Refine Your Technique
How do you know if your aurora photos are turning out well? You know your aurora photos are successful by reviewing them periodically and checking for sharpness, good exposure, and rich colors. Zoom in to verify stars appear as sharp points rather than streaks.
If photos appear too dark, increase exposure to 8 to 10 seconds. If they're too bright, reduce to 1 to 3 seconds. Check one photo from each burst, adjust if needed, then keep shooting. The aurora won't wait, and experiencing the show matters as much as the photos you create.
Tips for Successful iPhone Aurora Photography
What helps create the best iPhone aurora photos? Creating the best iPhone aurora photos comes from using a tripod, keeping Night mode active, and locking focus properly. These simple techniques transform your results from average to amazing.
Your tripod keeps everything perfectly steady during those 3 to 10 second exposures. Night mode captures the low-light beauty that regular photo mode misses. Locked focus ensures sharp stars and crisp aurora details.
Keep shooting and experimenting if your first attempts need improvement. Aurora photography rewards practice, and every display teaches you something new. Adjust settings, try different compositions, and stay enthusiastic. Your perfect shot is just around the corner.
Advanced iPhone Aurora Photography Techniques
How can you improve your iPhone aurora photos beyond the basics? You can elevate your iPhone aurora photos by shooting in RAW format and experimenting with Live Photos. These advanced techniques provide more creative control and capture the aurora's movement beautifully.
ProRAW (iPhone 12 Pro and newer) or third-party apps like Halide give you greater editing flexibility later. Live Photos capture 1.5 seconds of motion, creating engaging clips that show how the aurora dances and flows. While Live Photos work best during bright displays, they're wonderful for sharing on social media.
Editing Your iPhone Aurora Photos
Should you edit your aurora photos? Yes, light editing enhances your aurora photos beautifully when kept natural and subtle. Smart editing brings out details your iPhone captured while maintaining authentic colors.
Use your iPhone's Photos app for quick improvements. Slightly increase brightness, adjust contrast to make the aurora pop, and moderately tweak color saturation. The “Auto” button often provides an excellent starting point for fine-tuning.
Keep saturation natural. The aurora displays gorgeous colors, but overly bright, neon-green images look artificial. Show your edited photo to someone who witnessed the display with you and ensure it matches your shared experience.
Sharing Your Aurora Photos
How should you share your iPhone aurora photos? Share your iPhone aurora photos with location details, camera settings, and genuine excitement about the experience. Context makes your photos more engaging and helps fellow aurora chasers learn.
Include helpful details like “iPhone 13, 5-second exposure, captured near Fairbanks, Alaska.” This information inspires others to try photographing with their phones. If Aurora Admin's real-time alerts helped you catch the display, mentioning this helps others discover reliable forecasting.
Tag locations thoughtfully. General areas like “near Yellowknife” or “outside Reykjavik” provide useful information while respecting local access and privacy.
When to Consider Dedicated Camera Equipment
When should you consider upgrading beyond iPhone photography? Consider a dedicated camera when you're pursuing aurora photography seriously or creating large prints. For capturing memories and sharing on social media, your iPhone produces excellent results that satisfy most photographers.
Dedicated cameras offer advantages like better low-light performance and interchangeable lenses, but they're expensive and add bulk to your aurora adventure. Many enthusiastic aurora photographers happily use iPhones for years.
The best camera is the one you have when the lights appear. Your iPhone fits in your pocket and goes everywhere, ensuring you never miss magical aurora moments.
Frequently Asked Questions About iPhone Aurora Photography
Can older iPhones photograph the northern lights?
Can older iPhones photograph the northern lights? Yes, older iPhones can photograph the northern lights during bright displays using third-party camera apps with manual controls. iPhone 11 and newer models with Night mode produce significantly better results, but earlier models still capture beautiful auroras with the right settings (ISO 3200, 3 to 5 second exposure, tripod).
Do you need cell service to photograph auroras with your iPhone?
Do you need cell service to photograph auroras with your iPhone? No, your iPhone camera works perfectly offline for aurora photography. Cell service helps you receive Aurora Admin's real-time alerts that notify you when displays are active, check forecasts, and share photos immediately.
What iPhone settings drain battery fastest during aurora photography?
Screen brightness and cold temperatures drain batteries fastest during aurora photography. Keep brightness at 20 to 30 percent, store your phone in an inside pocket between shots for warmth, and consider airplane mode to conserve power.
Can you use third-party camera apps for better aurora photos?
Yes, you can use third-party apps to capture aurora photos. Using apps like NightCap, ProCamera, or Halide offer more manual controls for advanced photographers. The built-in Camera app with Night mode produces excellent results for most situations and stays simpler to use in the field.
How do you photograph auroras and stars together with iPhone?
How do you photograph auroras and stars together with iPhone? Photograph auroras and stars together using Night mode with 3 to 5 second exposures while keeping your phone steady on a tripod. These shorter exposures capture both aurora detail and sharp star points without trailing.
What's the best time of year to photograph auroras with your iPhone?
What's the best time of year to photograph auroras with your iPhone? The best time to photograph auroras is during winter months (September through March in the northern hemisphere) when longer darkness provides extended viewing opportunities. Check out our location-specific guides for regional timing tips.
Do you need to edit iPhone aurora photos?
Do you need to edit iPhone aurora photos? iPhone aurora photos often look wonderful straight from camera, though light editing (brightness, contrast, color balance) enhances details and creates more impactful images. Keep edits natural to represent what you actually witnessed.
Ready to capture stunning aurora photos with your iPhone?
Sign up for Aurora Admin alerts and never miss magical northern lights moments. Our real-time forecasting sends instant notifications when conditions align perfectly for aurora viewing in your area, giving you the 30 to 60 minute advance warning that makes all the difference. Join thousands of smart aurora chasers who trust Aurora Admin to bring aurora magic to their skies.