
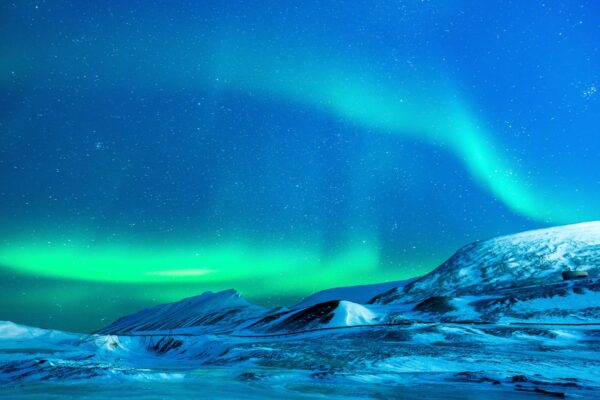
Do you want to learn how to photograph the auroras? Also known as the northern or southern lights, the aurora can last from a few minutes to hours. Being able to capture the cascading rainbow of colours is difficult, and its elusiveness doesn’t allow much time for fumbling around in the dark.
Nothing can prepare you for the excitement of seeing the aurora for the first time. And there’s something wonderful about being able to catch the moment forever, long after the lights have faded.
So to help you, we’ve put together a guide on the type of gear you need and photography advice on settings you should be focusing on.
Equipment
You don’t need too many gadgets to take sharp photos of the auroras. But having a few basics will make the experience more enjoyable, and it doesn’t have to be expensive. Let’s take a look at the main items that you will need to take with you.
Camera
Phone cameras are great for anyone that does not already own or wants to invest in a DSLR. While this may not be the best camera to use, it’s light to carry and completely fine to take some good pictures with.
It’s best to use a newer phone as old phones may not have good enough camera specs for this type of photography. Depending on the result you want, a decent app and a few tweaks for photographing the auroras can be sufficient for your needs.
A DSLR will give you the most flexibility especially if you want to take high-quality images. You’ll be doing low-light photography which means you need a camera that can do long exposures. The various functions and modes on a DSLR will also allow more freedom to customise according to the conditions of the light and the environment.
Type of Lens
Along with a DSLR, you’ll want to invest in a “fast lens” that’s wide-angled so that you can capture as much of the sky and scenery as possible. What is a wide-angle lens? Any lens with a focal length that’s under 35mm is considered a wide-angle lens – with 14mm being one of the most popular for taking pictures of the aurora.
If you’re deciding between zoom or a prime lens, then the prime lens is a better choice. Not only are they cheaper than a zoom, but the single focal length means that it is lighter to carry around and much faster. Look for a lens that allows an aperture of 2.8 or lower so that plenty of light is let into the camera.
Tripod
For taking long exposures, having a tripod is an essential piece of kit that you will want to take with you. Go for lighter travel-friendly tripods that are strong enough to support the weight of your camera. A remote isn’t necessary but can be a handy companion along with your tripod if you want to keep camera movement to the absolute minimum.
Camera Settings
There are many ways to take the perfect picture, but we will cover the most common ones here. It’s also best to practice changing the settings and doing some low-light photography beforehand as well as learning how to manual focus your camera quickly. This will make sure that things go smoothly on the night and adjusting any settings will feel second nature to you.
Camera Mode
Putting the camera on the manual setting will allow you to have full control of all the functions needed for low-light photography. You’ll want to adjust your aperture to the lowest number that your lens is capable of. All you need to remember is that the lower the aperture the more light will be let into your camera.
White Balance
This refers to the colour temperature when taking a picture. Depending on which setting you choose, the image can either appear bluer or more yellow in tone. Often the camera will automatically detect the lighting conditions and adjust the white balance accordingly, this allows images to look more natural.
When it comes to taking pictures of the aurora, it really depends on your preference. For example, if you prefer cooler tones, setting the white balance to tungsten will give a bluish tinge to your images. There are really no hard and fast rules here so feel free to play around with different settings to get the result that you want.
ISO Speed
The higher the ISO speed, the more grainy your pictures will come out, but you can’t have the setting too low as you’ll be taking your pictures at night when there’s not much light. Keep the ISO speed at a minimum of 1600 or a bit higher for the best results. Keep in mind that an ISO that’s above 3200 will give you more grainy images which you don’t want.
Shutter Speed
It’s difficult to give an exact timing for exposure, as this will depend on how bright the auroras are on the night. A typical exposure time for a bright and fast-moving aurora is somewhere between 5-10 seconds. Slower auroras will need a longer exposure time, so try starting with a 15-20 second shutter speed and extending the time according to how your images turn out.
Manual Focus
This is essential for keeping the stars looking sharp in your pictures. The manual focus needs to be set to true infinity, which is not always displayed on the camera lens – to check, look for an infinity ∞ symbol. If you can’t find it then there are other ways to find the true infinity on your lens like focusing on a far way object during daytime.
Other Useful Items
These items are not compulsory but are something you might want to consider when planning your photography trip. As with all weather forecasts, the conditions can change at the drop of a hat. And if you’ve travelled far to see the lights, then you don’t want to be caught out by that.
Here are a few nice-to-have items that can make all the difference without taking up much luggage space:
Head Torch Light
Once you’re out under the night sky, it will be dark, and you’ll want to see the settings on your camera easily. Although using a phone light or a small torch is perfectly fine, keeping both of your hands-free will make your life much simpler. You won’t win any fashion contests with a head torch, but it’s definitely an underrated piece of equipment that you’ll be glad to have on hand.
Ziplock Bags
A common problem with taking outdoor pictures or time lapses in cold weather is the risk of condensation on the camera lens. This happens when you move your camera from a cold to a warm area. Unfortunately, this can cause a bit of a headache if the condensation ends up inside the lens not just on the outside.
To prevent this from happening, a great trick is to keep your camera in ziplock bags. When doing this, try to get as much air out as possible.
Then once you arrive at your location, keep your camera equipment in the bags and leave them outside for an hour. This will allow your camera equipment to acclimatise to the cold without building any humidity or condensation.
Silica Packs
If you need some extra protection from humid conditions, keeping some silica packs inside the zip lock bags will help to absorb the excess moisture. They’re affordable and an easy way to protect your equipment and pictures from the elements. Depending on the type of weather that you’re exposed to, silica packs can last between 1-3 years.
Hand Warmers
Not only great for keeping your hands from turning into frozen lollies, but hand warmers are also another excellent trick for keeping the condensation away from your camera lens. All you need to do is to get an elastic band and strap the hand warmer onto the top of your camera lens – it’s as simple as that. You’ll never have to experience condensation on your camera lens again. Warmers will stay hot for up to 8 hours, so make sure you take a few packs with you.
Aurora Photograph Etiquette
We’ve mentioned a lot about the technicals about photographing the auroras but about respecting those around you. Often we see groups of photographers on a night out trying to capture the perfect photo only to have it ruined by people with poor camera etiquette.
A splash of light coming into the lens can ruin the perfect shot. When arriving on location with your car or truck try to not to put your brights on and shine your lights at others. This is the same with your torch lights and head lamps.
Approved access is safer than trespassing
Always ask for permission when going on someone elses land.
You may never know of hidden hazards on someone’s land or anything you might damage such as crops or other properties such as letting live stock out of a pasture.
When and Where to Photograph the Auroras
If you’re looking for a breathtaking and wild location away from the throngs of crowds, then Canada is a fantastic place to photograph the auroras. Other wonderful locations for seeing the northern lights include Alaska and Greenland. Looking to chase the southern lights? Then Tasmania, Australia and New Zealand will not disappoint.
When it comes to the best time, aim to take pictures on a clear night and during the winter season when the nights are long. Light coming from a full moon can also affect your images, so be sure to plan your photography trip during the new moon phase.
One last tip: sun worshippers never fail to check the weather, and the same applies to seeing the aurora. Plan your trip ahead today using our aurora forecasting tool for the most up-to-date information on any location.